How to Execute the TP Link Extender Login?
TP-Link Wi-Fi range extender aids in extending a Wi-Fi network. Installing a range extender in your home allows you to experience high-speed internet connection in every dead spot. You just need to ensure that your range extender is set up adequately in an appropriate location.
You are required to configure the extender as well. To do so, you need to begin the TP Link extender login to access its Web UI page. Further in this blog, we’ll be going over the process of the TP Link extender login. Keep reading ahead to learn about it in-depth.
The TP Link Extender Login Process
There are two procedures for the TP Link extender login; one using Web UI and the other using the Tether app. The steps for the login are as follows:
TP Link Extender Login Using Tether App
- First of all, you need to make sure your extender’s version is compatible with the tether app.
- Then, you can connect the device to the extender’s Wi-Fi.
- Now, open the Tether app.
- Next, to log in, click on your range extender.
- Afterward, enter the username and the password you are logging in the first time in your range extender using the Tether app.
The login via the app is successful.
TP Link Extender Login Using Web UI
- First, plug the extender into a power source close to your host router. Wait till the Power LED is on.
- Next, connect the computer to the extender’s network.
- If you are a window user, if there’s any ethernet cable connected to your computer, unplug it.
- Then, tap on the Wi-Fi icon and connect to the extender’s network.
- If you are a Mac OS X user, unplug the ethernet cable. Then tap on the Wi-Fi icon in the top right corner of the screen and connect to the extender’s network.
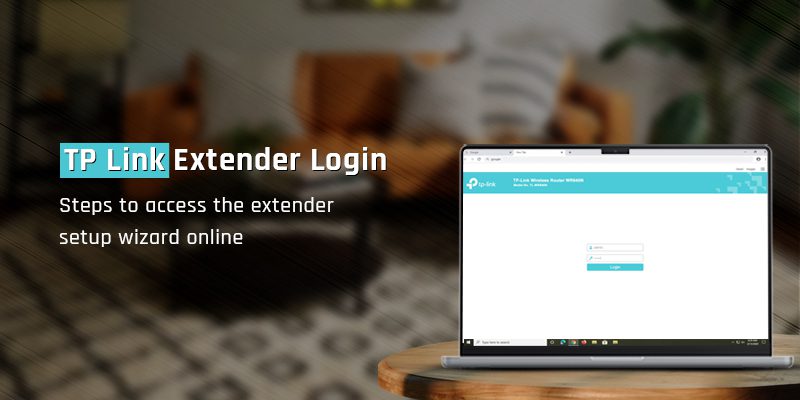
- Then, open a web browser and enter tplinkrepeater.net or the IP address in the address bar.
- As the login page appears, enter the username and password to log in.
The TP Link extender login is complete.
The TP Link Extender Setup Procedure
There are two ways to set up the TP-Link extender; one is through a web browser and another is through the WPS button. The methods are as follows:
TP Link Extender Setup Via Web Browser
- The very first step is to plug the extender into a power source. Wait till the power LED is lit solid green.
- Next, if there’s an ethernet plugged into your PC, you can unplug it. Connect to the extender’s networking by tapping on the Wi-Fi network icon.
- Then, open a web browser and access the login page of the extender.
- After logging into the extender’s Web UI, you can configure the extender.
- When the extender’s configuration is successful. You can relocate the extender somewhere between the router and the dead zone.
- Afterward, you just have to wait till the extender reconnects and the 2.4/5G LED light lits up green. If it’s having some difficulty connecting, you need to move it a little closer to the router to obtain a better signal.
The TP Link extender setup is completed.
TP Link Extender Setup Via WPS Button
- Initially, power on the extender and plug it into a power source. Then wait till the power LED is lit solid green.
- Next, press the WPS button and the extender simultaneously. When they will connect successfully, the RE, 2.4G, and 5G LEDs will light solid green.
- Then, move the extender between the router and the dead zone.
- Just remember the name and the password of the extended networks will be the same.
The TP Link Extender Setup is complete. Now you can enjoy a high-speed internet connection anywhere in your house. If this method isn’t working, try the first one to properly set up your TP-Link extender.
Configuration of the TP-Link Range Extender
After the TP-Link extender’s setup and the login, it is very important to configure the extender as well. To configure the extender, follow the mentioned steps:
- The first thing you need to do is log into the extender’s web UI.
- After logging in, you can visit the Quick Setup Wizard.
- As the Start screen appears, click on Next.
- Next, choose your router’s 2.4Hz network name and then click on Next.
- Then, enter the Wi-Fi password and then you can select the Copy from Main Router option or the Customize option to give the extender network a new name. Click on Next.
- Now, you can choose the router’s 5GHz network. Then click on Next and repeat the previous step. Then click on Next, to proceed further.
- Now you can verify the wireless settings and tap on Finish. The 2.4G and 5G LEDs will light up solid green.
The configuration of the TP-Link range extender is completed.
How to Reset the TP-Link Extender?
Is your TP-Link Wi-Fi extender malfunctioning? You can fix all your extender’s issues with just a simple reset. To perform a factory reset, follow the steps below:
- Locate the reset button on the rear panel of your extender.
- Then, press the reset button and hold it for approximately 6 to 10 seconds, making sure the device is powered on.
- After 6-10 seconds, release it and wait till the device reboots.
- The lights will flash and then turn off and when the lights slowly turn back on, indicates the device is successfully reset.
After resetting the device, all the issues will be troubleshot. Just remember after the factory reset, the device will go back to the factory default settings. Then you will have to set up the device and configure the settings once more. Or you can save a backup file of the settings and restore it after the reset.
This is the procedure for the setup and login of the TP-Link extender. If you are still facing issues with the extender, after the reset. Or if you having difficulty with the login or the setup, you can contact our team anytime and we’ll provide an effective solution to you.